How Do You Spray Paint A Car? – Expert Techniques Explained
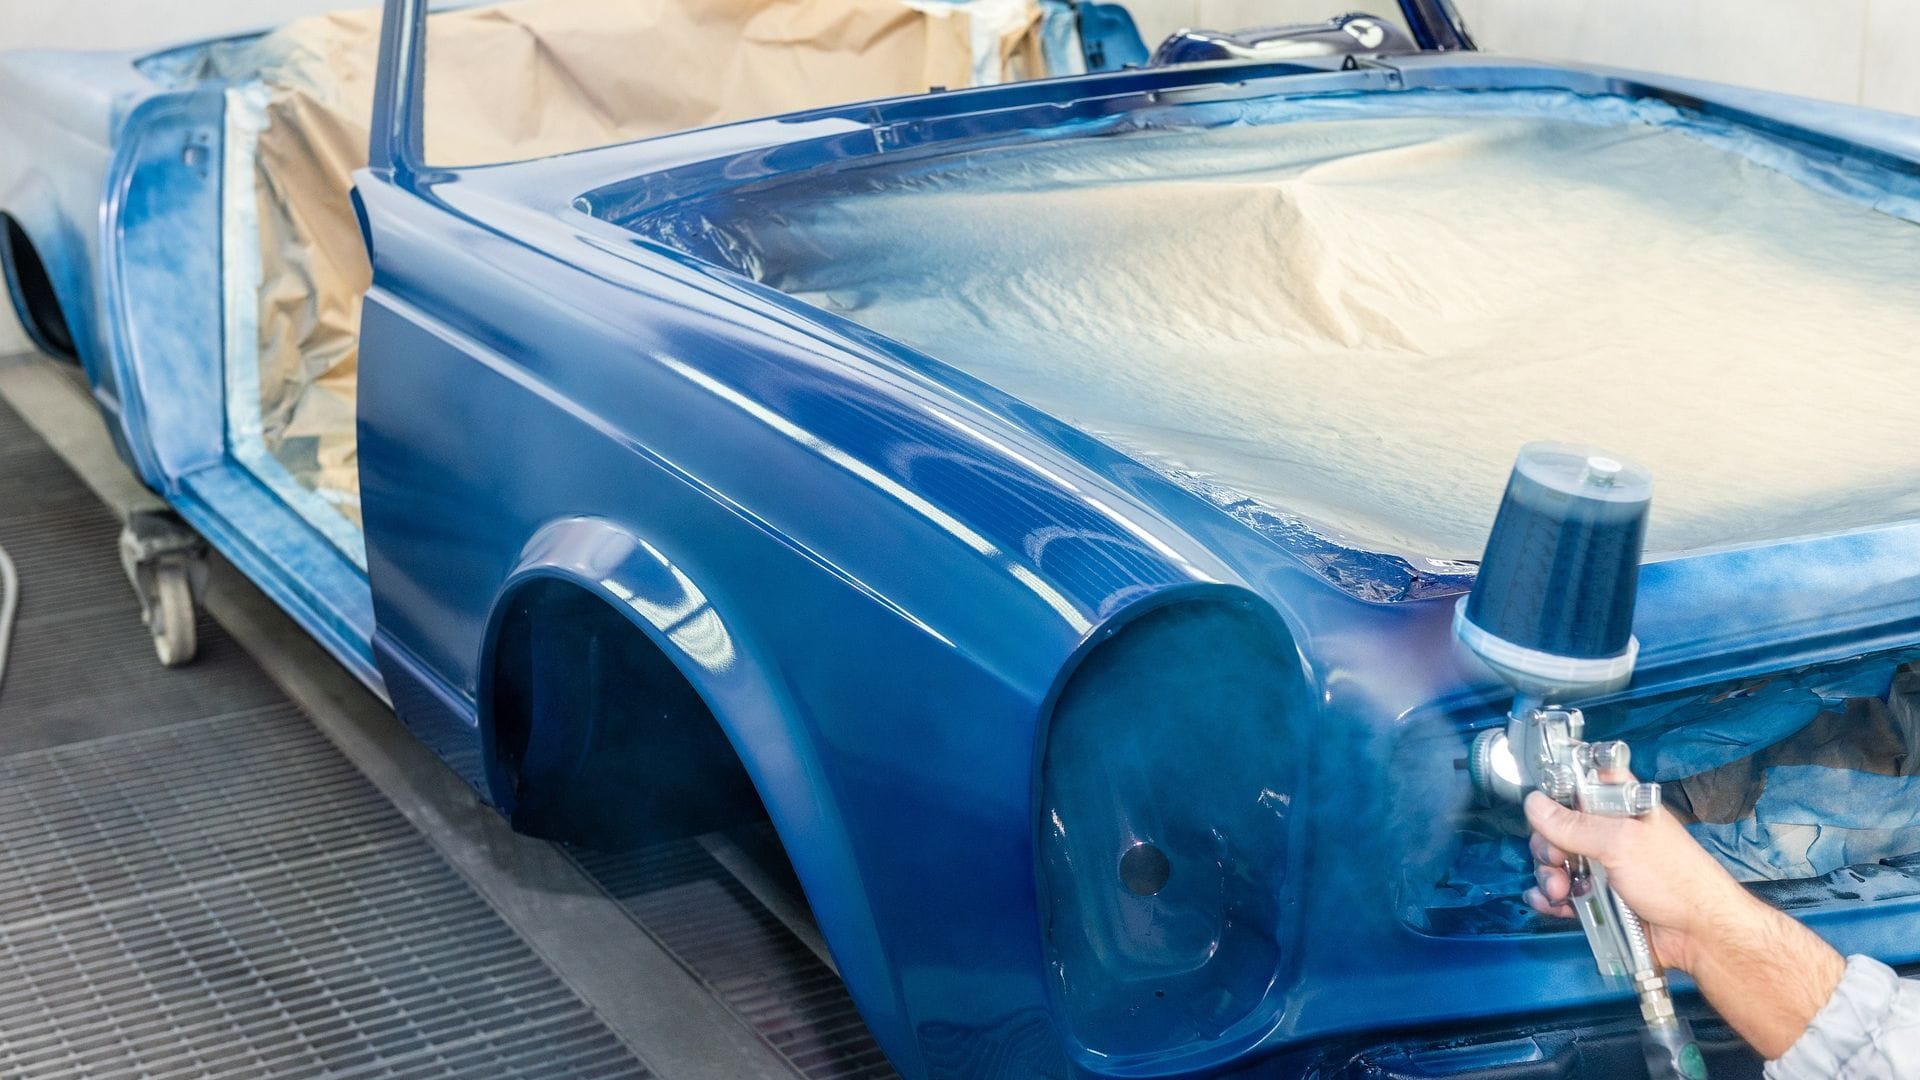
You’ve probably been looking at your car, noticing some imperfections or simply craving a fresh, new color. How do you spray paint a car, and is it something that you can do yourself?
Spray painting a car involves proper preparation, selecting the right paint and tools, and following a step-by-step process to achieve a professional finish. Whether it’s a touch-up or a complete transformation, this guide will provide all the essential information.
In this article, we will walk you through the process of spray painting a car at home, including the required tools and materials, the preparation process, painting techniques, and post-painting maintenance. Additionally, we will delve into car body repair essentials and discuss how to repair car scratches. Finally, we’ll address some frequently asked questions about spray painting and car body repair.
If reading the steps to spray painting a car isn’t to your liking, you can always watch these spray paint videos for expert advice and step-by-step instructions.
Key Takeaways
- Proper tools, materials, and preparation are crucial for a successful DIY car spray painting project
- Understanding the different types of car paint and using appropriate techniques help achieve professional results
- Addressing car body repairs and maintenance is essential for preserving the appearance and longevity of your vehicle.
Understanding Car Paint and Types
Car paint serves a dual purpose of providing aesthetic appeal and protecting the vehicle’s surfaces. When considering spray painting a car, understanding the types of paint available and their properties is important to achieve a high-quality and long-lasting finish.
There are mainly three types of car paint: lacquer, enamel, and urethane. Each type has its own unique characteristics and properties.
Lacquer: This type of paint was once the standard for automotive finishes. However, it is now challenging to find and illegal to spray in many areas due to pollution control regulations. Lacquer is easy to work with and dries quickly. It provides a high-gloss and smooth finish but lacks durability, making it more prone to chipping and peeling.
Enamel: Enamel paint is a popular choice for its improved durability compared to lacquer. It is available in both single-stage and two-stage (base coat and clear coat) systems. Single-stage enamel paints include both color and gloss, while two-stage paints require a separate clear coat for protection and shine. Enamel paints provide a hard, glossy finish that is resistant to fading and chipping but may take longer to dry and require more care during application.
Urethane: Urethane paints are known for their durability and resistance to UV rays, chemicals, and chipping. They come in both single-stage and two-stage systems, providing excellent coverage and a glossy appearance. While urethane paints are more expensive than lacquer and enamel alternatives, the increased protection and longevity make them a popular choice for professional auto painting.
When preparing to spray paint a car, it is essential to adhere to the proper steps and techniques. These steps include sanding the car’s sheet metal and plastic surfaces, masking body trim and glass to prevent overspray, using the appropriate primer, and wet sanding between coats. Depending on the type of paint used, the waiting time between coats may vary; typically, 15 to 20 minutes for most car paint types, and about 24 hours between primer and base coat or enamel-based paint application.
Remember to research and select the right type of car paint spray based on your needs, local regulations, and environmental factors. Achieving a high-quality spray paint job on a car requires patience, precision, and understanding of the various paint types and their properties.
Required Tools and Materials
When preparing to spray paint a car, there are several essential tools and materials that you will need to ensure a smooth and even finish. First and foremost, you will need automotive spray paint, which is specifically designed for use on car surfaces. This type of paint provides long-lasting, durable coverage and is available in a variety of colors to match your vehicle.
In addition to the spray paint, you will need automotive spray primer if the car’s surface requires it. Primer helps to create an even surface for the paint to adhere to, ensuring a more professional appearance and long-lasting result.
Before you begin spray painting, it is crucial to ensure the car’s exterior is clean. You will need a car exterior cleaner, such as a mild detergent or automotive surface cleaner, and a sponge to remove any dirt, grease, or grime from the surface. Properly cleaning the car is essential for achieving a smooth, even paint job.
Once the car is clean, you will need several items for surface preparation. Sandpaper, specifically 600-grit, is necessary for sanding the area to be painted. This will remove any loose paint and create a surface to which the new paint can better adhere. Also, acquire drop cloths to protect the surrounding area from paint overspray.
Personal protection is crucial during the spray painting process. Goggles, a respirator, rubber gloves, and work clothes should be worn to protect your eyes, lungs, and skin from exposure to paint fumes and particles.
Finally, you will need a paint gun and a compressor for the actual spray painting process. The paint gun allows you to apply the paint evenly and consistently, while the compressor powers the paint gun and controls the flow of paint from the canister. These tools can be purchased or rented from most hardware stores.
By gathering these essential tools and materials and following proper preparation techniques, you can confidently spray paint your car to achieve a professional-looking result.
Preparation Process
Damage Inspection
Before starting the process of spray painting a car, it’s essential to inspect the vehicle for any dents and damages. Pull out large dents using a dent repair kit to smooth the painting surface. It’s crucial to address any imperfections, as they can negatively affect the final result.
Cleaning and Sanding
Prior to spray painting, the car must be thoroughly cleaned to remove dirt, grease, and contaminants. Use a suitable cleaning solution to clean the entire surface and rinse with water. Dry the car completely before proceeding to the next step.
Once the car is clean, sand the area to be painted using 600-grit sandpaper. Rub the sandpaper back and forth over the entire area, effectively removing any loose paint, rust, or residue. The goal is to create a smooth and even surface for the paint to adhere to properly.
If the existing paint is in good condition, prepare it with a fine Scotch-Brite pad, which provides a rough surface for the new paint to grip. Bodywork and primer should be block sanded to a minimum of 220-grit, with 320-grit being the preferred choice for optimal results.
In conclusion, adequately preparing the car’s surface by inspecting for damages and thoroughly cleaning and sanding it ensures a successful and professional-looking spray paint job.
Painting Technique
Priming
Before beginning the car spray painting process, it is crucial to properly prepare the surface of the car. Start by sanding the car using low grit sandpaper, such as 80 or 300 grit pieces, to smooth out any scratches or imperfections. Afterward, practice wet sanding methods with 1000 or higher grit papers to achieve a smoother surface. This preparation will make the spraying process easier and result in a better outcome.
Spraying
Once the surface has been adequately prepared, it’s time to move on to the actual car painting spray. Hold the spray can at a consistent distance from the car’s surface and apply even, steady strokes as you paint. Avoid spraying too close to the surface, as this may cause the paint to run or create an uneven coat. Make sure to apply the paint in thin layers, allowing each layer to dry before applying the next, to prevent drips and ensure an even coverage.
Finish Coating
After the car has been spray painted with the desired color, the final step is to apply a clear coat. This is important in order to preserve the color of your paint job and protect it from the sun’s UV rays, which can cause fading. Wet sand the painted surface and then apply the clear coat with the same technique used for spraying the paint. Allow the clear coat to fully dry before using the car or exposing it to the elements. This finishing touch will result in a professional-looking and long-lasting paint job for your car.
Common Mistakes and How to Avoid Them
Spray painting a car can be a daunting task, especially for those who are doing it for the first time. To achieve a professional-looking finish, it is essential to be familiar with common mistakes and learn ways to avoid them.
One common mistake is spray painting in unsuitable weather conditions. Painting in extreme heat or cold can cause issues, such as the paint freezing in the nozzle. Avoid painting when temperatures are too high or low to ensure even coverage and proper drying.
Another mistake is improper sanding before painting. Sanding the surface with a 1000 – 1200 grit sandpaper between primer and paint applications ensures a smooth, even finish. Skipping this step may lead to a surface that looks uneven and unprofessional.
Applying heavy, thick coats of paint is another mistake to avoid. Instead, apply thin coats of paint using short, overlapping, and horizontal strokes. This technique will create a more even finish and prevent nozzle clogging of the spray can.
Incorrect use of reducers can also cause issues with the final paint appearance. Ensure that the reducer used matches the specific needs of the weather conditions and paint type. The wrong reducer can cause solvents to evaporate too fast, preventing the paint from creating an optimal finish.
Lastly, improper air pressure during the spray painting process can lead to uneven paint application. Ensuring the correct air pressure for the paint sprayer, typically around 100 bar, helps achieve a consistent finish.
Avoiding these common mistakes will allow anyone undertaking the task of spray painting a car to create a professional-looking result.
Post-Painting Maintenance
After successfully spray painting a car, it’s essential to conduct proper post-painting maintenance to ensure the paint job’s longevity and appearance. By following these guidelines, you can protect the new paint and keep your car looking great.
First, allow the paint to cure completely before exposing the car to the elements or washing it. Generally, it takes about a week for the paint to harden. During this time, avoid taking the car through automatic car washes or using high-pressure water hoses, as this may damage the fresh paint.
Once the paint has cured, it’s time to wash the car. Always use a gentle car wash soap and a clean sponge or microfiber cloth to avoid scratching the new paint. Start washing from the top of the car and work your way to the bottom, rinsing the sponge frequently to remove any dirt and debris.
After washing, it’s essential to dry the car thoroughly. Use a clean, dry microfiber towel to gently pat the surface dry, rather than wiping it with a towel, which may cause micro-scratches. Avoid letting the car air dry, as this can leave water spots on the new paint.
Next, apply a high-quality paint sealant to protect the new paint. Choose a sealant specifically designed for cars, and follow the manufacturer’s application instructions carefully. Typically, the car should be clean and dry, and the sealant should be applied in a thin, even layer using a foam applicator. Allow the sealant to cure as per the manufacturer’s recommendations before exposing the car to water or dirt.
Finally, maintain the paint’s appearance by waxing the car regularly. Car wax not only enhances the shine and depth of the paint but also provides a protective barrier against contaminants and UV rays. A car should be waxed every 2-3 months, depending on the conditions it is exposed to and the type of wax used.
By following these post-painting maintenance steps, you can preserve the fresh look of your spray painted car and protect the paint job from damage, ensuring that it remains in top condition for years to come.
Car Body Repair Essentials
Scratch Repair
Scratches on a car can significantly affect its appearance and value. Repairing scratches involves a series of steps like cleaning, sanding, and applying a primer, base coat, and clear coat. Begin by cleaning the scratched area to remove dirt and debris. Next, lightly sand the area with 2000-grit sandpaper to remove the clear coat and smooth the edges of the scratch. Wipe the surface with a tack cloth to clean it again.
Apply a thin layer of automotive primer to the scratched area, allowing it to dry. Multiple layers may be necessary to achieve a consistent finish. Once the primer is dry, apply the base coat paint that matches the vehicle’s color. Apply the paint in thin layers, letting each layer dry before applying the next. Finally, apply a clear coat to protect the repair and let the paint cure for the recommended time.
Dent Removal
To fix a dent in your car, it’s important to understand the best method for the specific situation. Common techniques for dent removal include paintless dent repair (PDR), using a plunger, or using body filler.
Paintless dent repair is a technique that involves high-level skill from trained professionals. They use specialized tools to massage the dent out from the back of the damaged panel. Though this method isn’t suitable for all dent types, it’s an effective option for smaller dents and minimal bodywork damage.
In certain cases, using a plunger can help to pull the dent out, particularly for large and shallow dents. To do this, dampen the plunger and the dented area, then push the plunger firmly against the dent and pull outwards. Repeat these steps, gradually working around the dent until it’s eliminated.
For larger dents or those requiring additional repair, body filler may be necessary. First, remove the paint from the affected area with sandpaper. Then, mix the appropriate amount of body filler and hardener, and apply it to the dent using a spreader. Allow the filler to dry and harden. Once hard, sand the area until the surface is smooth and flat. Finish the repair with relevant paint and clear coat.
Car body repair is essential to maintain your vehicle’s aesthetics and value. By following these steps for scratch repair and dent removal, you can successfully repair your car and have it looking like new again.
Understanding the Importance of Body Repair
Body car repair is an essential aspect of maintaining your vehicle’s appearance and structural integrity. If a car has dents, scratches, or rust, it will not only affect the overall look of your car, but could also lead to more severe problems if not addressed. Car body repair plays a pivotal role in preparing the surface for spray painting, ensuring a smooth and long-lasting finish.
One aspect of car body repair is using filler, also known as “bog,” to smooth out any imperfections, dents, or scratches on the car’s surface. There are different types of fillers available, ranging from heavy-duty options that contain glass fibers to finishing putty designed explicitly for flattening out small imperfections. Proper filler application is crucial to achieve an even surface for painting.
Before spray painting a car, it’s essential to thoroughly sand the sheet metal and plastic to create a smooth, even surface for the paint to adhere to. Sanding also helps remove any rust on the car’s body. If rust is left unaddressed and painted over, it can continue to spread beneath the paint, causing the surface to bubble and eventually damage the car’s structure.
Taping off and masking body trim and glass is another vital step in the car body repair process. This prevents overspray and ensures that paint is only applied to the intended areas. By carefully masking off the necessary parts, you’ll save time and effort in the cleanup process after painting is complete.
Wet sanding is another technique used in car body repair that helps achieve a pristine paint job. After applying primer, wet sanding the car with fine-grit sandpaper (usually 1000-1200 grit) further smoothens the surface and removes any remaining imperfections. This step is critical before applying the base coat or enamel-based paint, ensuring a smooth and even finish.
In conclusion, body repair is a crucial step in the process of spray painting a car. Proper surface preparation, filler application, and sanding techniques contribute to a high-quality paint job that not only enhances your car’s appearance but also provides essential protection against rust and other potential issues.
Repairing Car Scratches
Car scratch repair is an essential aspect of maintaining a vehicle’s aesthetics and ensuring its longevity. When faced with scratches on your car, it’s important to address them promptly to prevent rust and further damage. There are various methods to repair scratches on a car, and one of the most common is using spray paint.
Before starting the scratch repair process, it’s crucial to identify the depth of the scratch. If the scratch is shallow and only affects the clear coat – it can often be fixed by using rubbing compound or scratch remover. However, for deeper scratches that have penetrated the paint layer, spray painting is usually the most effective solution.
To repair scratches on a car using spray paint, follow these steps:
- Clean the area: Thoroughly wash and dry the area surrounding the scratch to ensure there is no dirt or debris that could interfere with the paint application process.
- Sand the scratch: Use sandpaper (preferably 2000-grit) to gently sand the scratch and surrounding area. This step will help the new paint to adhere better, ensuring a smooth finish. Be careful not to sand too deep into the paint layers.
- Tape off the area: Apply masking tape around the edges of the scratch to protect the unaffected paint from overspray.
- Apply primer: If the scratch has reached the metal layer, apply a thin layer of automotive primer to the affected area, allowing it to dry according to the manufacturer’s instructions.
- Paint the scratch: Shake the spray paint can well, then spray a light coat of matching touch-up paint on the scratch. Hold the can about 10-12 inches away from the surface and use a steady back and forth motion. Allow the paint to dry for the specified time, then apply additional coats as needed.
- Finish with clear coat: Apply a clear coat spray to protect the newly painted area and ensure a glossy finish. Allow it to dry before removing the masking tape.
- Polish and wax the area: Finally, gently polish the repaired area with a fine rubbing compound to blend it seamlessly with the surrounding paint. Afterward, apply a coat of wax to the entire vehicle to ensure a consistent appearance.
In summary, repairing scratches on a car is essential to maintaining its overall aesthetics and preventing further damage, such as rust. Utilizing spray paint is a practical and efficient method for repairing scratches, especially when they have reached the paint layer or beyond.
If you need help, you can download hundreds of spray painting tutorials here.
How Do You Spray Paint A Car? – Frequently Asked Questions
What is the proper technique for applying spray paint on a car?
It’s important to apply the spray paint in thin, even coats, holding the can at a consistent distance and moving it from side to side. Make sure to overlap each pass slightly, allowing each coat to dry properly before applying the next one.
Which type of spray paint is best for automotive use?
Automotive spray paint should be used for cars, as it is specifically formulated for the materials and conditions unique to automotive surfaces. This type of paint is more durable and provides better adhesion than regular spray paint.
What are the necessary preparations before spray painting a car?
Before spray painting a car, clean the surface thoroughly, removing dirt, grime, and debris. Sand down any rough spots or imperfections with sandpaper, fill in dents or scratches with body filler, and apply a coat of automotive spray primer if required.
How to create a smooth finish with spray paint on a vehicle?
To achieve a smooth finish, spend time practicing good wet sanding methods using high-grit sandpapers (1000 or higher). Proper surface preparation and using thin, even coats of paint are crucial to attaining a professional-looking result.
Are there any alternatives to using a paint booth for spray painting a car?
While it’s ideal to have access to a paint booth for spray painting a car, an alternative is to use a well-ventilated area, such as a garage with proper airflow. Ensure the environment is free of dust and airborne particles that could contaminate the paint job.
What is the correct order of steps for spray painting a car?
- Clean the car’s exterior thoroughly.
- Sand and fill any imperfections.
- Apply automotive primer if needed.
- Apply thin, even coats of automotive spray paint.
- Allow each coat to dry before applying the next.
- Wet sand the final coat for smoothness.
- Apply a clear coat for protection and shine.
- Allow the clear coat to dry before driving.
Can I spray paint my car myself?
Yes, it is possible to spray paint your car yourself. However, it requires patience, proper technique, and attention to detail to achieve a professional-looking result.
Do you have to sand a car to spray paint it?
Yes, sanding is necessary before spray painting a car. It helps to smooth out the surface and remove any scratches or imperfections, which results in a better paint adhesion and appearance.
What is the best automotive paint for beginners?
For beginners, it’s recommended to use an acrylic enamel or acrylic urethane paint. These types of paints are easier to work with and provide a durable finish that requires less maintenance.
What is the cheapest way to paint a car at home?
The cheapest way to paint a car at home would be to use rattle cans of automotive spray paint. This method is more affordable than purchasing professional equipment or having it painted at a shop. However, obtaining a high-quality finish with rattle cans requires skill, patience, and proper preparation.


