Suzuka: Key Corners, Sectors and What Makes It Unique
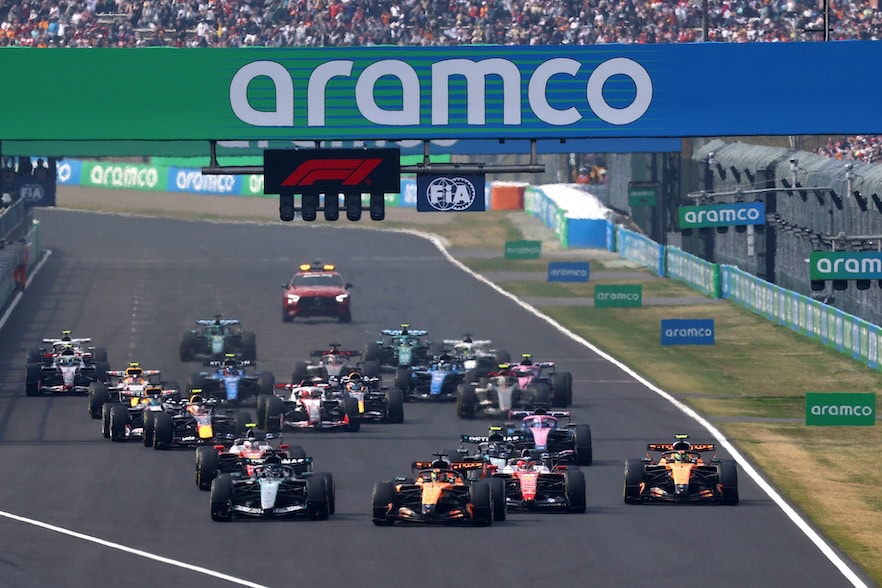
Eighteen corners across three sectors, a figure-eight that crosses over itself, and a rhythm that rewards commitment from the first apex to the last. No other circuit on the Formula 1 calendar asks as many different questions of a driver and car within a single lap. Suzuka’s layout flows in a way that punishes hesitation and amplifies even small errors, which is why drivers consistently rank it among the most satisfying tracks to drive quickly and the most unforgiving when they get it wrong.
Sector 1: The Esses and the Commitment Test
Turns 1 and 2
A lap of the Suzuka circuit begins with a right-left combination that sets the tone for everything that follows. Turn 1 is a medium-speed right-hander approached from the start-finish straight at full throttle. The braking point is later than it looks on a track map because the corner opens up at the exit, but getting the entry wrong here pushes the car wide and compromises the line into Turn 2. The left-hand second corner tightens slightly on exit and feeds directly into the start of the S Curves, which means any loss of momentum through Turns 1 and 2 carries forward into the most critical sequence on the circuit.
In the 2026 era, the transition from X-mode to Z-mode happens under braking for Turn 1. The wings rotate to their high-downforce position as the driver lifts off the throttle, adding stability at corner entry but also introducing drag that changes the deceleration profile compared to previous regulation eras. Getting the timing right between the wing transition and the braking point is one of the first setup variables teams address during practice at Suzuka.
The S Curves: Turns 3 Through 7
The S Curves are Suzuka. Five consecutive direction changes taken at speeds between 200 and 260km/h, with the car constantly loading and unloading lateral force as it switches from left to right and back again. There is no straight section between the corners. Each apex feeds directly into the next, and the driver must commit to the racing line through the entire sequence without hesitation because the margins between a perfect run and a lost tenth are measured in centimeters of car placement.
What makes the Esses so difficult is that each corner in the sequence has a slightly different radius and speed. The first S is the fastest, taken in the highest gear with the car close to its aerodynamic limit. The sequence tightens progressively through the middle elements before opening slightly at the exit of Turn 7. The driver cannot treat it as a single combined corner because the optimal line through the third S is different from the optimal line through the first, but they cannot treat the corners independently either because the exit of each one defines the entry to the next.
For the 2026 cars, the S Curves raise a specific question about the active aerodynamic system. The car is neither fully accelerating nor fully braking through most of the sequence, which means the automatic lift-off regen trigger that switches the wings to Z-mode may or may not activate depending on how the driver manages throttle application between the corners. Teams that calibrate the wing transition thresholds precisely for the Esses will carry more speed through the sequence than those running a generic setup. This is one of the areas where the interaction between driver technique and ECU calibration defines lap time in the 2026 era.
Dunlop Curve: Turn 8
After the S Curves, the circuit drops downhill through a fast left-right flick before arriving at the Dunlop Curve, a long sweeping left-hander that carries significant speed and leads onto a short straight before the Degner section. The Dunlop Curve was the site of Jules Bianchi’s accident in 2014, and the run-off area has been substantially modified since then. From a driving perspective, the corner demands confidence on entry because the car is still carrying speed from the Esses, and the transition from the flowing rhythm of the first sector into the more technical second sector happens here.
Sector 2: Precision Through the Degners and Under the Bridge
Degner 1 and Degner 2: Turns 9 and 10
The Degner Curves are named after Ernst Degner, the motorcycle racer who crashed at this point of the circuit during its early years. They consist of two right-hand turns that look similar on a map but demand very different approaches from the driver. Degner 1 is a fast, sweeping right-hander taken with the car close to maximum lateral grip. The challenge is carrying enough speed through the first Degner to maintain momentum while also positioning the car correctly for the much tighter Degner 2 that follows immediately.
Degner 2 is one of the hardest corners on the circuit because it requires heavy braking from the speed carried through Degner 1, and the turn-in point arrives before the car is fully settled from the direction change. Getting the balance wrong between the two corners costs time in both of them: a cautious approach through Degner 1 loses speed on entry, while an aggressive approach compromises the braking zone for Degner 2 and forces a wider exit that hurts the run through the tunnel section.
After Degner 2, the track drops through the underpass that runs beneath the main straight, creating the crossover point that gives Suzuka its figure-eight layout. The tunnel section is not a corner in itself, but the change in gradient as the track descends and then climbs back up affects car balance and braking performance in ways that are unique to Suzuka. No other circuit on the calendar has a section where the car passes beneath the track it was on moments earlier.
The Hairpin: Turn 11
The hairpin is the slowest point on the circuit. A tight 180-degree right-hander that brings the car down from moderate speed to less than 70km/h at the apex, it is one of the few places at Suzuka where pure mechanical grip matters more than aerodynamic performance. The narrow track width through the hairpin makes it difficult to run two cars side by side, and the low-speed nature of the corner means the 2026 cars are operating in a regime where the MGU-K’s torque delivery through the rear axle has a more significant influence on traction than at any other point on the lap.
Exit traction from the hairpin is critical because it feeds onto the longest straight section in the second sector, leading up to Spoon Curve. Any wheelspin or hesitation on the throttle at the hairpin exit costs speed that accumulates across the entire straight. Teams pay close attention to differential settings and rear suspension compliance through this section because the combination of slow-speed traction and the rapid transition to full power demands a car that responds predictably as the driver applies the throttle progressively through the exit phase.
Sector 3: Spoon, 130R, and the Final Chicane
Spoon Curve: Turns 13 and 14
Spoon is a long, double-apex left-hander that curves through approximately 180 degrees and keeps the car under sustained lateral load for longer than almost any other corner on the calendar. The first apex is taken at relatively high speed, and the driver must resist the instinct to tighten the line too early because the second apex requires a wider arc that only works if the entry is committed and patient. The name comes from the shape of the run-off area on the outside, which curves like the bowl of a spoon, though the driving experience is anything but gentle.
The sustained cornering duration through Spoon makes it one of the most aerodynamically demanding corners at Suzuka. The car spends several seconds at high lateral load, which means the tyre wear through this section is disproportionately high compared to shorter corners taken at similar speeds. Teams that sacrifice mid-corner downforce to gain straight-line speed often find they pay for it through Spoon, where the car slides more on entry and overheats the rear tyres through the extended turn. The setup compromise between Spoon performance and straight-line speed through the rest of the lap is one of the defining engineering decisions of any Suzuka weekend.
130R: Turn 15
Everything about 130R is speed. Named for its 130-meter radius, it is a sweeping left-hander taken at approximately 300km/h where the car runs at or very near its maximum lateral grip capacity for an extended duration. The corner entry is partially blind because the track curves slightly on approach, and the barrier on the outside is close enough that a loss of control at this speed has immediate and serious consequences. 130R is the corner that drivers talk about when they describe what makes Suzuka special, because it requires a combination of precision, trust in the car’s grip level, and willingness to commit at a speed where the consequences of getting it wrong are significant.
In previous regulation eras, 130R was taken flat out by the fastest cars with the highest downforce configurations. The 2026 regulations reduce overall downforce by approximately 30% compared to the previous generation, which means 130R may no longer be a guaranteed flat-out corner for all cars in all conditions. Whether a driver lifts off the throttle even slightly through 130R, or whether the car has enough grip to take it at full speed, will depend on the aerodynamic setup and the confidence level of the individual driver. That variation between drivers who commit fully and those who hedge even marginally will be visible in the sector time data and could produce meaningful lap time differences at a corner that appears on a track map as a single sweeping line.
The Chicane: Turns 16, 17, and 18
The final chicane is where Suzuka delivers its primary overtaking opportunity. After the high-speed commitment of 130R, the track drops into a tight left-right-left sequence that requires heavy braking from well over 250km/h to less than 100km/h. The braking zone is long enough to create a genuine late-braking opportunity, and the tight entry to the first element of the chicane means a car on the inside line under braking can force the defending driver to concede position.
The chicane also sets up the run onto the start-finish straight, which means the exit speed through the final element directly affects the speed the car carries through the first sector on the following lap. A poor chicane exit at the end of one lap costs time at the start of the next, and the cumulative effect across a race distance is significant. In qualifying, the chicane is where the final hundredths of a second are either gained or lost, depending on how much the driver is willing to risk on the kerbs and how precisely they hit the apex of each element.
For the 2026 overtake override system, the chicane activation zone gives the following car an additional power advantage if they are within one second of the car ahead. The 350kW MGU-K output extends up to 337km/h rather than the standard rampdown from 290km/h, providing extra straight-line speed into the braking zone. Combined with the long braking distance, this makes the chicane the point on the circuit where position changes are most likely to happen under racing conditions.
What Makes the Complete Lap So Demanding
The Lap as a Whole
Individual corners at other circuits may match the difficulty of any single element at Suzuka. Spa has Eau Rouge for high-speed commitment, Monaco has the Swimming Pool section for precision, and Monza has Parabolica for bravery. What separates Suzuka from all of them is that the entire lap operates at this level. There is no recovery section, no sequence of easy corners where the driver can relax and reset. From the first direction change in the Esses to the final braking point at the chicane, every corner demands attention, and the rhythm of the lap means that a mistake at any point disrupts the flow through everything that follows.
The figure-eight layout contributes to this by ensuring the circuit has no dominant direction bias. Circuits that run predominantly clockwise or counterclockwise allow drivers to develop a rhythm in one direction, but Suzuka’s crossover means the car is turning left and right in nearly equal measure across the full lap. This tests the symmetry of the car’s setup, the driver’s ability to adapt between left and right corners, and the consistency of the tyre performance across both loading directions. Teams that arrive at Suzuka with a car that is strong in one direction but compromised in the other will be exposed across the full lap in a way that a conventional circuit layout would not reveal.
The elevation changes add a third dimension to the challenge. The first sector runs along the higher ground of the circuit before dropping through the Degners and the tunnel section. The third sector climbs back up through Spoon before the 130R section, which sits at a different elevation to the start-finish straight. These gradient changes affect braking performance, power delivery, and aerodynamic load in ways that are specific to each corner, and they contribute to the distinctive rhythm that makes a qualifying lap at Suzuka one of the most satisfying achievements in the sport.
Analysis for this article was provided by PlayUSA, whose broader research across US gaming markets, including Michigan casinos, helps inform data-driven insights into fan engagement and sports interest.
Suzuka Circuit Corner FAQs
How Many Corners Does the Suzuka Circuit Have?
The Suzuka Circuit has 18 corners across its 5.807-kilometer lap. The layout includes eight left-hand turns and ten right-hand turns, creating a near-symmetrical directional balance that is unusual among Formula 1 circuits. The corners range from the ultra-fast S Curves taken above 200km/h to the tight hairpin at Turn 11 where speeds drop below 70km/h, and from the sweeping double-apex of Spoon Curve to the heavy-braking chicane that ends the lap.
The 18-corner count is sometimes listed as 17 in older sources because the chicane at the end of the lap can be counted as either two or three separate corners depending on the classification method. The FIA’s official circuit map for the 2026 Japanese Grand Prix lists 18 turns, which is the figure used in all current timing and data systems.
Where Do Most Overtakes Happen at Suzuka?
Most overtakes at Suzuka happen at the chicane at the end of the lap, Turns 16 through 18. The long approach from 130R at over 250km/h creates a heavy braking zone where the following car can use the slipstream and, in the 2026 era, the proximity-based overtake override to carry additional speed into the braking zone. The tight entry to the first element of the chicane rewards late braking and allows the attacking driver to claim the inside line.
Turn 1 is the second most common overtaking point, particularly on the opening lap when cars arrive from the start-finish straight in close proximity. The braking zone into Turn 1 is shorter than the chicane approach, which makes clean overtakes harder to execute, but the wider track entry gives the attacking driver more room to position alongside before the corner. Beyond these two points, Suzuka is difficult to overtake on because the fast, flowing nature of the S Curves, Degner section, and Spoon Curve means any car that is offline through these corners loses aerodynamic performance and tyre temperature, making it very hard to complete a pass through the technical sections of the circuit.
What Is the Fastest Corner at Suzuka?
The fastest corner at Suzuka is 130R, Turn 15, where Formula 1 cars reach approximately 300km/h while navigating a sweeping left-hand curve with a 130-meter radius. In previous regulation eras with higher overall downforce, 130R was taken at full throttle by the fastest cars. Under the 2026 regulations, which reduce downforce by approximately 30%, whether 130R remains a flat-out corner depends on the specific aerodynamic configuration and the conditions on the day.
The S Curves in the first sector are the next fastest section of the circuit, with cars reaching speeds between 200 and 260km/h through the five consecutive direction changes. While the individual apex speed at each S Curve is lower than 130R, the average speed across the entire sequence is among the highest of any multi-corner section on the Formula 1 calendar.
Where Is the Best Place to Watch Suzuka F1?
The best place to watch Formula 1 at Suzuka depends on what you want to see. The Degner Grandstand offers close-up views of one of the most challenging braking zones on the circuit, where cars transition from high speed into the tight Degner 2 corner and the gap between the fastest and slowest drivers is most visible. The 130R general admission area, accessible on the hillside above the corner, provides a view of the fastest point on the circuit where cars pass at approximately 300km/h.
For overall race atmosphere, the Main Grandstand covers the start-finish straight, pit lane activity, race starts, and the approach to the final chicane, which is the circuit’s primary overtaking zone. Fans in the Main Grandstand see more position changes than anywhere else on the circuit. The Spoon Curve general admission area is a popular choice among knowledgeable fans because it offers a sustained view of cars under high lateral load through the double-apex left-hander, and the hillside positioning provides natural elevation that makes it easy to see multiple sections of the circuit from a single vantage point.
Comments
More in News
2026 F1 winners and losers; who stands where during this enforced lull?
Niki Lauda Before the Crash: The Driver, the Fire, and the Greatest Comeback in F1
‘Grateful that they made the decision for me’, Daniel Ricciardo reflects on F1 axing

Alpine highlight “equal opportunity for both drivers to be competitive,” in open letter addressing online abuse
